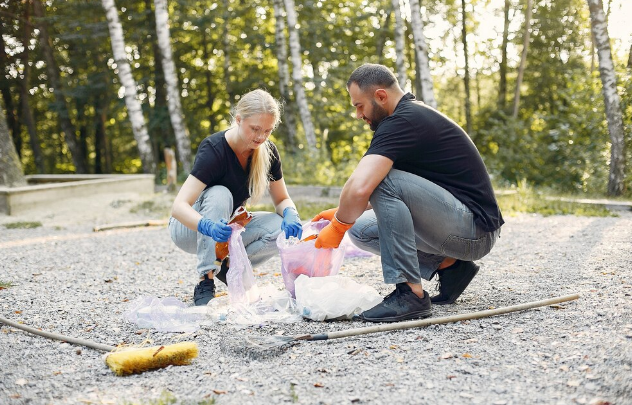
When a water emergency happens, most property owners act fast. Whether it’s a burst pipe, roof leak, or appliance overflow, they grab towels, rent a few fans, and do what they can to dry things out. It feels proactive — maybe even empowering. But here’s the truth that many learn the hard way: just because a surface feels dry doesn’t mean the problem is gone.
Water-damaged materials are notorious for hiding moisture. Beneath a seemingly dry floorboard or behind a freshly painted wall, water can linger for days or even weeks. These “false dry zones” — areas that feel or appear dry but aren’t — are one of the leading causes of long-term property damage after DIY water cleanup attempts.
In this article, we’ll explore why these hidden wet zones form, how they fool even well-intentioned homeowners and contractors, and what must be done to avoid the serious consequences that often follow.
The Science of Moisture Retention in Building Materials
Not all materials absorb and release moisture the same way. Understanding how different materials react to water is key to understanding why false dry zones are so common.
- Woodabsorbs water slowly but holds it deep within the grain
- Drywallmay feel dry on the surface even when the interior core remains saturated
- Concretecan take weeks to fully dry due to its porous structure
- Insulationholds water like a sponge, especially behind sealed walls
- Laminate and vinyl flooringoften trap moisture beneath their vapor barrier layers
When someone dries the surface with towels or airflow, it creates the illusion that everything is back to normal. But water trapped within or behind these materials isn’t just inconvenient — it’s dangerous.
The Illusion of Progress: What DIY Tools Miss
Many homeowners use moisture meters they’ve purchased online, or rely on feel and appearance. But consumer-grade tools rarely provide an accurate picture of moisture deep inside materials.
Even some contractors rely solely on surface readings. For example, a pin-type moisture meter will give a dry reading on the painted surface of drywall — even if the insulation behind it is saturated.
Real professionals use thermal imaging cameras, non-invasive deep scanning tools, and follow moisture mapping protocols to track where water migrated. Without these tools, DIYers are left with guesswork — and the risk of mold, rot, or structural weakening increases significantly.
The Cost of Getting It Wrong
False dry zones create ideal conditions for problems that don’t show up until weeks or months later:
- Mold growth, often behind walls or under floors, which spreads before it’s noticed
- Musty odorsthat indicate microbial activity, even if the room looks fine
- Warped flooring, as trapped moisture slowly deforms materials
- Peeling paint or bubbling drywall, caused by moisture resurfacing
- Increased humidity levels, which strain HVAC systems and degrade indoor air quality
- Electrical risks, if water migrated into wall outlets or light fixtures unnoticed
These outcomes aren’t hypothetical. They’re the reason so many DIY restoration attempts end up costing more in the long run. What could have been a small, contained issue now requires full demo, mold remediation, and often insurance claims that could’ve been avoided.
Why Time Makes False Dry Zones Worse
Moisture doesn’t just sit — it spreads. It follows gravity, wicks through porous materials, and seeps into cracks you don’t know exist.
Let’s say you mop up a bathroom leak and run a fan for 24 hours. The tile feels dry. You pat yourself on the back and move on. But underneath the vanity, water migrated into the cabinet toe-kicks. From there, it seeped into the subfloor and insulation behind the wall. That hidden water now has three options: stay, grow mold, or weaken the materials until failure.
By the time you realize what’s happening — perhaps when the floor starts to bow or the room smells musty — the damage is ten times worse than the original leak. All because that “dry” floor tricked you.
The Role of Capillary Action and Vapor Barriers
Capillary action is the phenomenon where water moves upward or sideways through small pores in a material. It’s how water can rise in drywall above the flood line or creep across concrete slabs without visible signs.
Additionally, many homes now use vapor barriers — materials meant to prevent moisture from moving in or out. These include underlayment beneath vinyl floors or house wraps behind exterior siding. While they’re great for managing outdoor moisture, they also trap water inside the structure when leaks occur, creating pockets of trapped humidity.
This is why even a room with circulating air and fans may still hold wet zones — the moisture has nowhere to go.
Real-World Scenarios of False Dry Zones
- Living Room Carpet Dry on Top, Soaked Underneath
A pipe burst soaked a homeowner’s carpet. They used shop vacs and fans to dry it. The carpet felt dry in two days. Two months later, mold was growing on the underside — and in the pad and subfloor. - Ceiling Leak Dried and Painted Too Soon
A second-floor bathroom overflowed. The ceiling below dried for a few days and was repainted. The drywall later crumbled, and mold bloomed between the ceiling and attic insulation. The entire ceiling had to be replaced. - Kitchen Cabinet False Dry Zone
Water from a dishwasher leak was dried quickly — except for the toe kicks under the cabinets. Moisture spread along the base and created wood rot. A year later, a minor sag became a full cabinet collapse.
In each case, the DIY work wasn’t lazy — it was uninformed.
The Need for Verification, Not Just Drying
Real drying means verifying, not assuming. That’s why professional restoration teams don’t pack up the moment the surface is dry. They take final moisture readings. They check all sides of an affected wall, including behind it. They understand how water migrates — and how long it actually takes to release from materials safely.
A quick Google for water damage restoration near me might connect you with local vendors — but choosing the right team means finding one who understands what causes failures, not just what fixes surfaces.
How Property Owners Can Avoid False Dry Zone Mistakes
- Don’t rely on how something feels.Always assume water traveled farther than you can see.
- Use moisture meters and thermal imaging.Or hire someone who does.
- Be cautious with cosmetic fixes.Don’t paint, seal, or replace until you’re 100% sure materials are dry.
- Keep an eye on relative humidity.If it stays high days after cleanup, there’s likely moisture still trapped.
- Document the drying process.This helps with insurance and protects you during resale inspections.
When It’s Time to Call the Pros
If a cleanup involves walls, ceilings, wood floors, insulation, or anything that’s layered or sealed — skip the guesswork. It’s not about making you feel helpless. It’s about protecting your building, your health, and your investment.
A seasoned restoration team will do more than remove visible water. They’ll build a drying plan, monitor humidity daily, and inspect for hidden issues that your eyes and hands can’t catch. They’re not just there for the emergency — they’re there to ensure the recovery holds.
Final Thoughts
False dry zones are the hidden threat inside every DIY water cleanup. They form easily. They fool homeowners. And they cost more than most people realize.
The good news? They’re preventable. With the right tools, training, and time, any water damage can be fully remediated — not just masked. But it takes more than box fans and gut instinct. It takes knowledge of how water behaves inside buildings, and a commitment to finding every pocket it leaves behind.
So the next time you hear, “It feels dry,” ask a better question: “What’s hiding underneath?”
Because that’s where the real damage — or the real solution — begins.